

Hybrid identity
Before the hands-on lab setup guide
May 2022
Information in this document, including URL and other Internet Web site references, is subject to change without notice. Unless otherwise noted, the example companies, organizations, products, domain names, e-mail addresses, logos, people, places, and events depicted herein are fictitious, and no association with any real company, organization, product, domain name, e-mail address, logo, person, place or event is intended or should be inferred. Complying with all applicable copyright laws is the responsibility of the user. Without limiting the rights under copyright, no part of this document may be reproduced, stored in or introduced into a retrieval system, or transmitted in any form or by any means (electronic, mechanical, photocopying, recording, or otherwise), or for any purpose, without the express written permission of Microsoft Corporation.
Microsoft may have patents, patent applications, trademarks, copyrights, or other intellectual property rights covering subject matter in this document. Except as expressly provided in any written license agreement from Microsoft, the furnishing of this document does not give you any license to these patents, trademarks, copyrights, or other intellectual property.
The names of manufacturers, products, or URLs are provided for informational purposes only and Microsoft makes no representations and warranties, either expressed, implied, or statutory, regarding these manufacturers or the use of the products with any Microsoft technologies. The inclusion of a manufacturer or product does not imply endorsement of Microsoft of the manufacturer or product. Links may be provided to third party sites. Such sites are not under the control of Microsoft and Microsoft is not responsible for the contents of any linked site or any link contained in a linked site, or any changes or updates to such sites. Microsoft is not responsible for webcasting or any other form of transmission received from any linked site. Microsoft is providing these links to you only as a convenience, and the inclusion of any link does not imply endorsement of Microsoft of the site or the products contained therein.
© 2022 Microsoft Corporation. All rights reserved.
Microsoft and the trademarks listed at https://www.microsoft.com/en-us/legal/intellectualproperty/Trademarks/Usage/General.aspx are trademarks of the Microsoft group of companies. All other trademarks are property of their respective owners.
Contents
A Microsoft Azure subscription with at least 16 vCPUs available in the Azure region where the Azure VMs deployed in this lab will reside.
A Microsoft account with the owner or the contributor role in the Azure subscription
Note: The lab computer does not require locally installed software.
Timeframe: 150 minutes
Log in to the Azure portal at http://portal.azure.com, and select All services. Then search for and select Subscriptions.
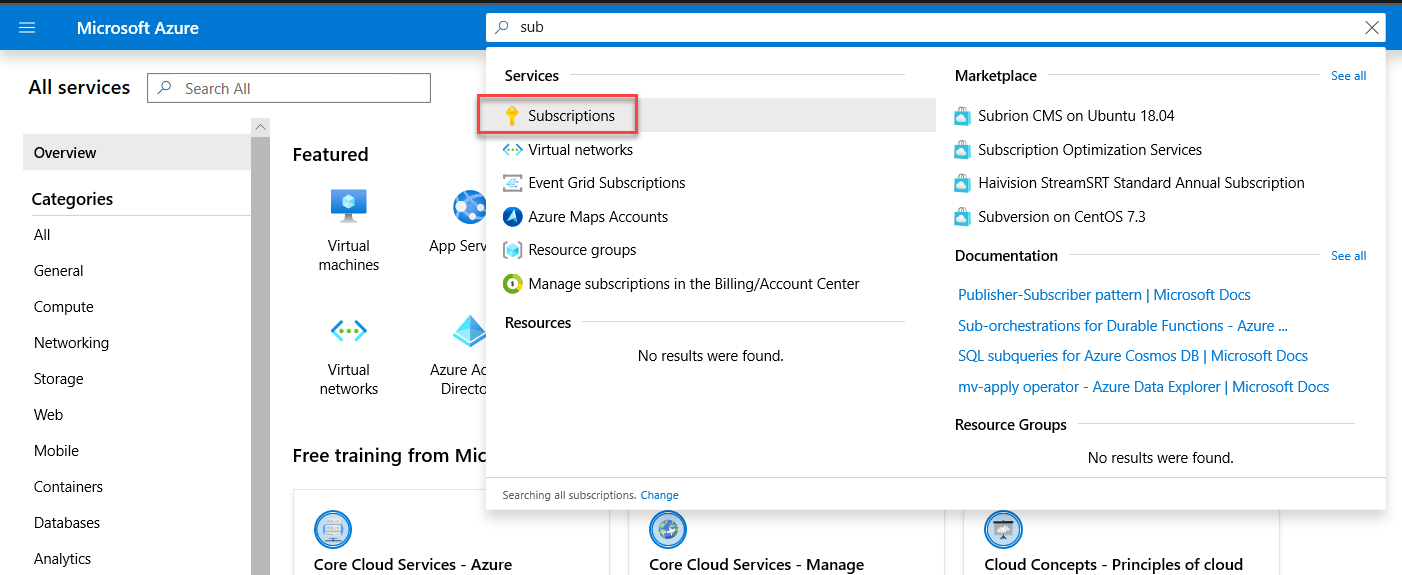
On the Subscriptions blade, select the name of the subscription you intend to use for this lab.
On the subscription blade, select Access control (IAM).
Review the list of user accounts, and verify that your user account has the Owner or Contributor role assigned.
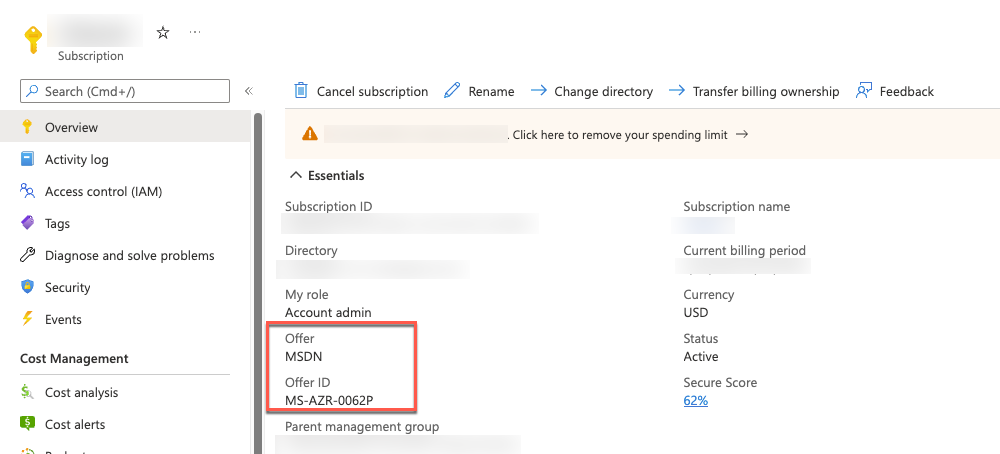
Navigate to the subscription you’re going to use and select Overview in the subscription blade.
Review the Offer and compare it with the list found at: https://azure.microsoft.com/en-us/support/legal/offer-details/. Make sure that the offer doesn’t have a spending limit on it. Subscriptions with spending limits will be unable to complete all the steps of the lab.
In the browser window displaying the Azure portal, navigate to: https://github.com/maxskunkworks/TLG/tree/master/tlg-base-config_3-vm.
On the TLG (Test Lab Guide) - 3 VM Base Configuration (v1.0) page, select Deploy to Azure.
Note: The 3 VM Base Configuration provisions a Windows Server 2016 Active Directory domain controller named DC1 using the domain name you specify and a domain member server named APP1 running Windows Server 2016. It also offers an option to provision a client VM running Windows 10; however, we will not be using it in our lab (primarily due to licensing requirements applicable when running Windows 10 VMs in Azure). The domain member server (APP1) has automatically installed .NET 4.5 and IIS.
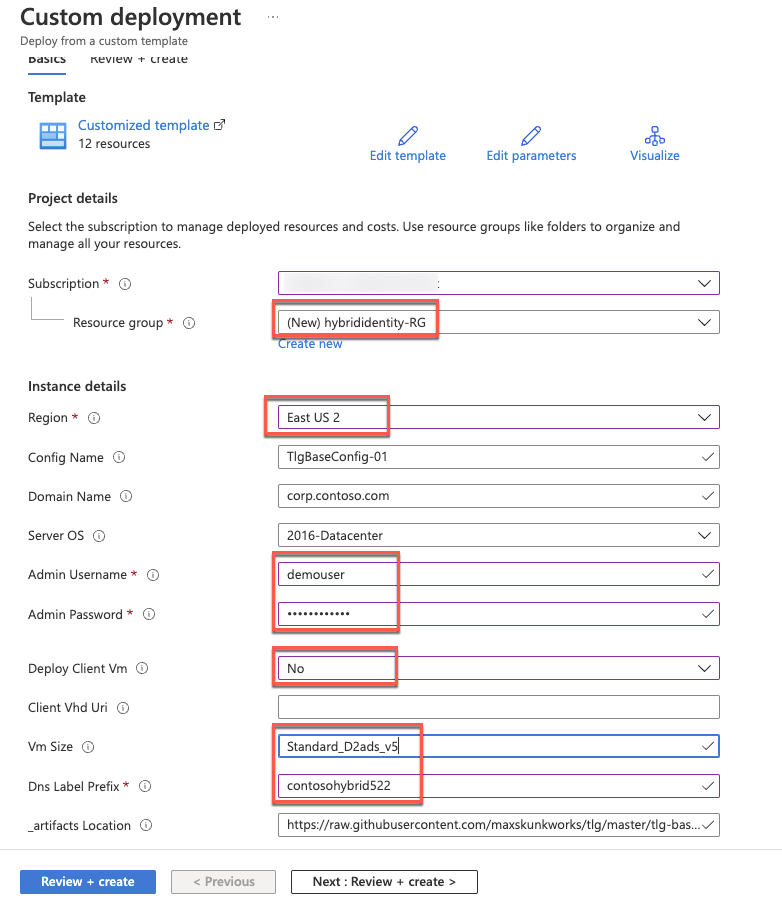
On the Custom deployment blade, specify the following settings, select Review + Create, then Create.
Subscription: The name of the target Azure subscription where you want to provision the lab environment Azure VMs.
Resource group: (Create new) hybrididentity-RG
Location: The name of the Azure region that will host the lab environment Azure VMs.
Config Name: TlgBaseConfig-01
Domain Name: corp.contoso.com
Server OS: 2016-Datacenter
Admin Username: demouser
Admin Password: demo@pass123
Deploy Client VM: No
Client VHD URI: leave blank
VM Size: Standard_D2ads_v5
Note: Use a similar VM size if your subscription does not support the listed size. Documentation is linked here: https://docs.microsoft.com/en-us/azure/virtual-machines/windows/sizes.
DNS Label Prefix: Any valid, globally unique DNS name - a unique string consisting of letters, digits, and hyphens; starting with a letter and up to 47 characters long.
_artifacts Location: Accept the default
_artifacts Location Sas Token: leave blank
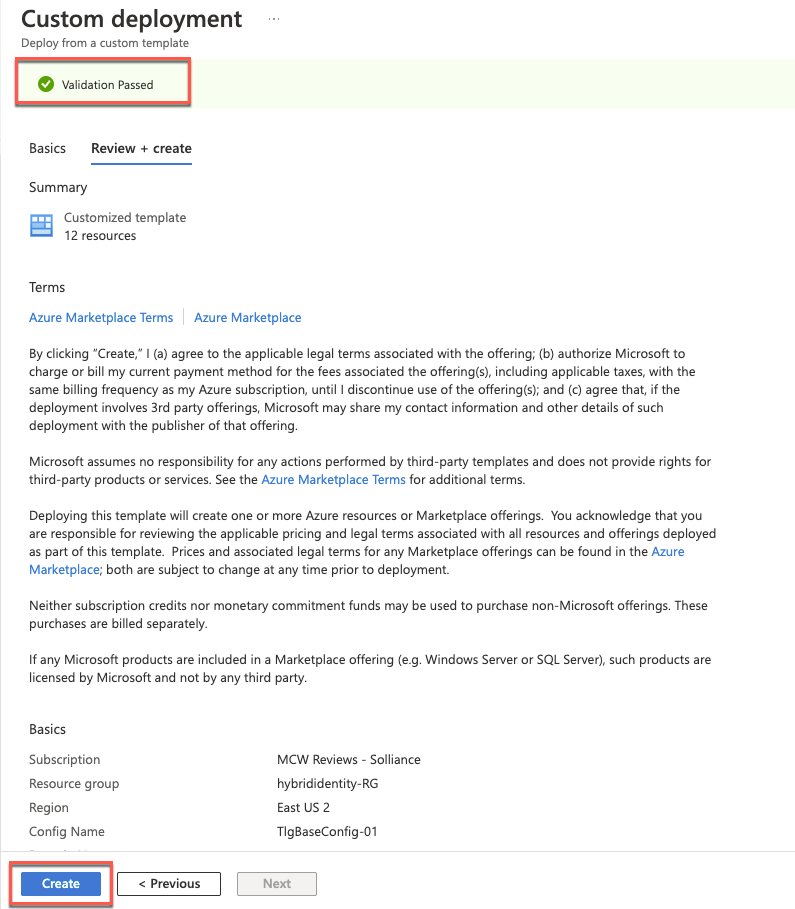
Select Review + Create.
After validation has passed, select Create.
Wait for the deployment to complete. The deployment might take about 60 minutes.
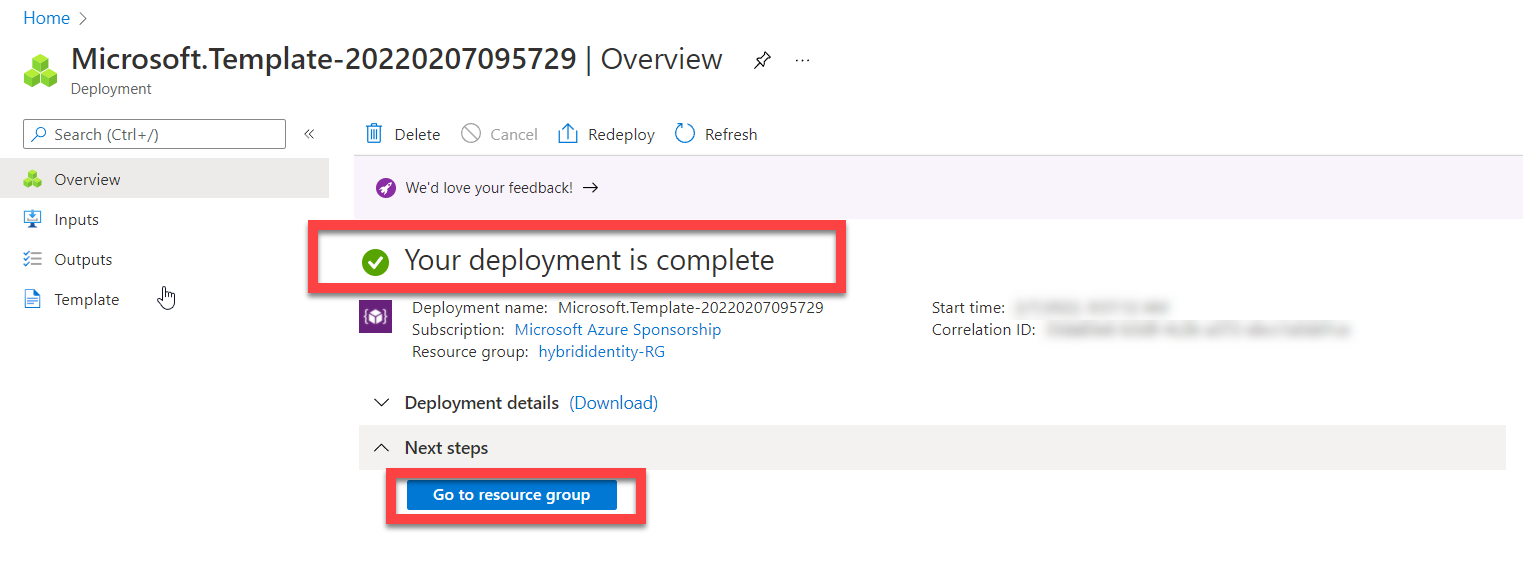
In the browser window displaying the Azure portal, navigate to the DC1 Azure VM and connect to it via Remote Desktop. When prompted, sign in by using the following credentials:
Username: demouser
Password: demo@pass123
Note: If you get a prompt asking if you want your device to be discoverable on the network, select No.
Within the Remote Desktop session to DC1, start Windows PowerShell and run the following script to disable Internet Explorer enhanced security configuration and User Access Control on both DC1 and APP1 Azure VMs:
$vmNames = @('dc1','app1')
Invoke-Command -ComputerName $vmNames {Set-ItemProperty -Path "HKLM:\SOFTWARE\Microsoft\Active Setup\Installed Components\{A509B1A7-37EF-4b3f-8CFC-4F3A74704073}" -Name "IsInstalled" -Value 0}
Invoke-Command -ComputerName $vmNames {Set-ItemProperty -Path "HKLM:\SOFTWARE\Microsoft\Active Setup\Installed Components\{A509B1A8-37EF-4b3f-8CFC-4F3A74704073}" -Name "IsInstalled" -Value 0}
Invoke-Command -ComputerName $vmNames {Set-ItemProperty "HKLM:\SOFTWARE\Microsoft\Windows\CurrentVersion\Policies\System" -Name "ConsentPromptBehaviorAdmin" -Value 00000000}Note: To run multiple PowerShell scripts in the same file, you can highlight a specific portion of the script and select Run Selection next to the green play button.

Within the Windows PowerShell window, add the following script to the script pane, and run it to install Remote Server Administration Tools on both DC1* and APP1** Azure VMs:
$vmNames = @('dc1','app1')
Invoke-Command -ComputerName $vmNames {Install-WindowsFeature RSAT -IncludeAllSubFeature}
Within the Windows PowerShell window, add the following script to the script pane, and run it to enable TLS 1.2 on both DC1* and APP1** Azure VMs:
    $vmNames = @('dc1','app1')
    Invoke-Command -ComputerName $vmNames {New-Item 'HKLM:\SOFTWARE\WOW6432Node\Microsoft\.NETFramework\v4.0.30319' -Force}
    Invoke-Command -ComputerName $vmNames {New-ItemProperty -Path 'HKLM:\SOFTWARE\WOW6432Node\Microsoft\.NETFramework\v4.0.30319' -Name 'SystemDefaultTlsVersions' -Value '1' -PropertyType 'DWord' -Force}
    Invoke-Command -ComputerName $vmNames {New-ItemProperty -Path 'HKLM:\SOFTWARE\WOW6432Node\Microsoft\.NETFramework\v4.0.30319' -Name 'SchUseStrongCrypto' -Value '1' -PropertyType 'DWord' -Force}
    Invoke-Command -ComputerName $vmNames {New-Item 'HKLM:\SOFTWARE\Microsoft\.NETFramework\v4.0.30319' -Force}
    Invoke-Command -ComputerName $vmNames {New-ItemProperty -Path 'HKLM:\SOFTWARE\Microsoft\.NETFramework\v4.0.30319' -Name 'SystemDefaultTlsVersions' -Value '1' -PropertyType 'DWord' -Force}
    Invoke-Command -ComputerName $vmNames {New-ItemProperty -Path 'HKLM:\SOFTWARE\Microsoft\.NETFramework\v4.0.30319' -Name 'SchUseStrongCrypto' -Value '1' -PropertyType 'DWord' -Force}
    Invoke-Command -ComputerName $vmNames {New-Item 'HKLM:\SYSTEM\CurrentControlSet\Control\SecurityProviders\SCHANNEL\Protocols\TLS 1.2\Server' -Force}
    Invoke-Command -ComputerName $vmNames {New-ItemProperty -Path 'HKLM:\SYSTEM\CurrentControlSet\Control\SecurityProviders\SCHANNEL\Protocols\TLS 1.2\Server' -Name 'Enabled' -Value '1' -PropertyType 'DWord' -Force}
    Invoke-Command -ComputerName $vmNames {New-ItemProperty -Path 'HKLM:\SYSTEM\CurrentControlSet\Control\SecurityProviders\SCHANNEL\Protocols\TLS 1.2\Server' -Name 'DisabledByDefault' -Value '0' -PropertyType 'DWord' -Force}
    Invoke-Command -ComputerName $vmNames {New-Item 'HKLM:\SYSTEM\CurrentControlSet\Control\SecurityProviders\SCHANNEL\Protocols\TLS 1.2\Client' -Force}
    Invoke-Command -ComputerName $vmNames {New-ItemProperty -Path 'HKLM:\SYSTEM\CurrentControlSet\Control\SecurityProviders\SCHANNEL\Protocols\TLS 1.2\Client' -Name 'Enabled' -Value '1' -PropertyType 'DWord' -Force}
    Invoke-Command -ComputerName $vmNames {New-ItemProperty -Path 'HKLM:\SYSTEM\CurrentControlSet\Control\SecurityProviders\SCHANNEL\Protocols\TLS 1.2\Client' -Name 'DisabledByDefault' -Value '0' -PropertyType 'DWord' -Force}
Within the Windows PowerShell window, add the following script to the script pane, and run it to configure Windows Integrated Authentication on the Default Web Site hosted on the APP1 Azure VM:
$vmNames = @('app1')
Invoke-Command -ComputerName $vmNames {Enable-WindowsOptionalFeature -Online -FeatureName IIS-WindowsAuthentication}
Invoke-Command -ComputerName $vmNames {Set-WebConfigurationProperty -Filter "/system.webServer/security/authentication/anonymousAuthentication" -Name Enabled -Value False -PSPath IIS:\ -Location "Default Web Site"}
Invoke-Command -ComputerName $vmNames {Set-WebConfigurationProperty -Filter "/system.webServer/security/authentication/windowsAuthentication" -Name Enabled -Value True -PSPath IIS:\ -Location "Default Web Site"}Within the Windows PowerShell window, from the console pane, run the following to restart APP1:
Restart-Computer -ComputerName 'APP1'Within the Windows PowerShell window, from the console pane, run the following to restart DC1:
Restart-Computer -ComputerName 'DC1'Connect again to the DC1 Azure VM via Remote Desktop. When prompted, sign in by using the following credentials:
Username: demouser
Password: demo@pass123
Within the Remote Desktop session to DC1, start Internet Explorer and navigate to the link below.
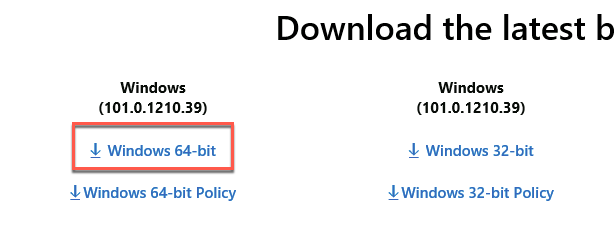
https://www.microsoft.com/en-us/edge/business/downloadDownload and install Edge for Windows 64-bit
Close Internet Explorer.
Within the Remote Desktop session to DC1, start Microsoft Edge from the desktop and navigate to the link below.
https://github.com/microsoft/MCW-Hybrid-identity/tree/main/Hands-on%20lab/studentfilesOn the Create Users/Group for Active Directory Demo/Test Environment page, select the CreateDemoUsers.ps1 link, right-click on Raw, and select Save link as to save it to the local file system.

On the Create Users/Group for Active Directory Demo/Test Environment page, select the CreateDemoUsers.csv link (directly above the PowerShell code section) and use the same method to save the corresponding csv file to the same location as the CreateDemoUsers.ps1 file.

Note: When saving the .csv file, save it at a csv and not a txt file or change the file extension to .csv after downloading the file.
Within the same Microsoft Edge window, navigate to the URL below.
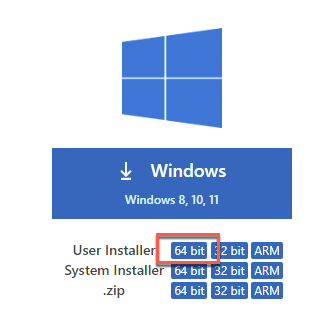
https://code.visualstudio.com/DownloadDownload and install the 64-bit User Installer of Visual Studio Code.
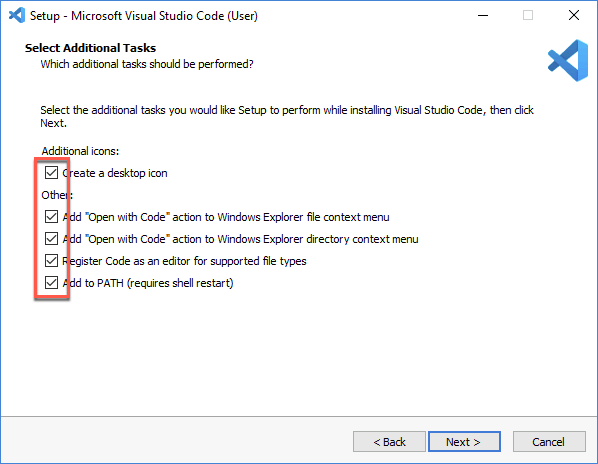
When you get to the Select Additional Tasks screen, select all checkboxes before clicking Next >.
Within the Remote Desktop session to DC1, start File Explorer, navigate to the folder where you downloaded both files, right-click on the file CreateDemoUsers.ps1, select Properties, in the CreateDemoUsers.ps1 Properties dialog box, check the Unblock checkbox, and select OK.
Within the File Explorer window, right-click on the file CreateDemoUsers.ps1 again and select Open with Code.
Close the Get Started tab in Visual Studio Code and then click to install the PowerShell extension.
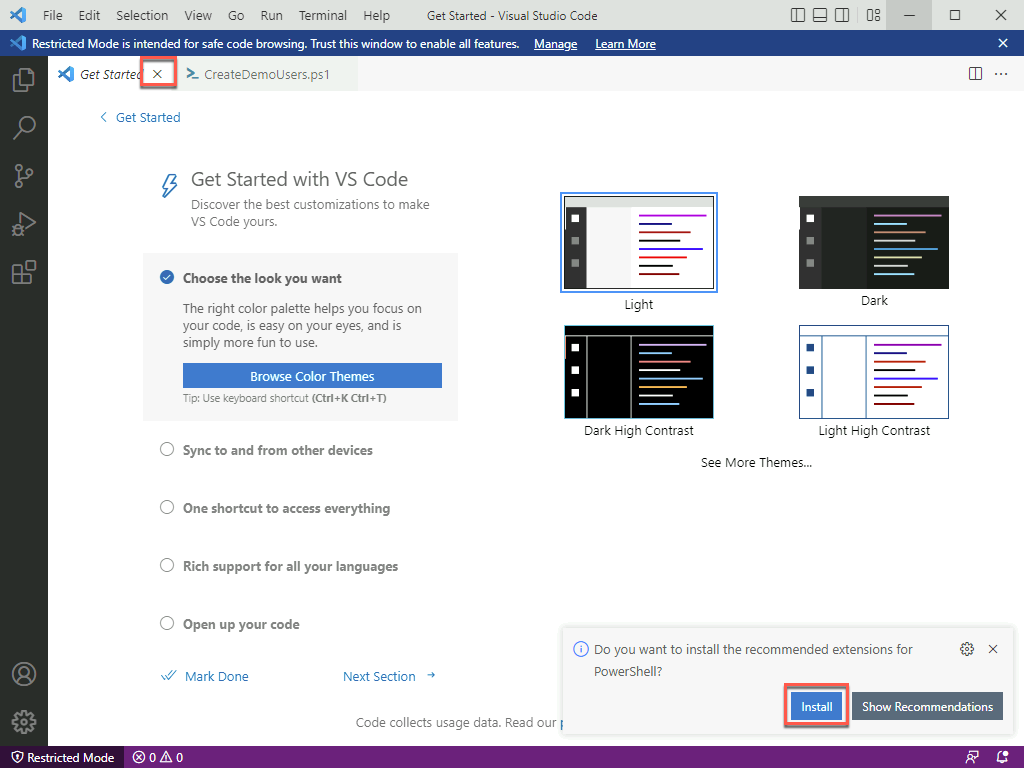
In the resulting pop-up window, select Trust Workspace & Install.

In the Visual Studio Code window, change line 148 from:
$UserCount = 1000 #Up to 2500 can be createdto:
$UserCount = 2500 #Up to 2500 can be createdIn Visual Studio Code, save the change. Then, in Windows PowerShell, run the CreateDemoUsers.ps1 script to create a lab environment organizational unit hierarchy, and populate it with test user accounts.
Within the Windows PowerShell window, run the following script to modify the settings of the AD user accounts you will use in this lab:
$adUser1 = Get-ADUser -Filter {samAccountName -eq "AGAyers"}
$adUser1groups = $adUser1 | Get-ADPrincipalGroupMembership
$adUser1groups | foreach { if ($_.name -ne 'Domain Users') {Remove-ADPrincipalGroupMembership -MemberOf $_.name -Identity $adUser1.DistinguishedName} }
Add-ADPrincipalGroupMembership -MemberOf 'Engineering' -Identity $adUser1.DistinguishedName
Move-ADObject -Identity $adUser1.DistinguishedName -TargetPath 'OU=NJ,OU=US,OU=Users,OU=Demo Accounts,DC=corp,DC=contoso,DC=com'

Set-ADAccountPassword -Identity 'CN=Ayers\, Ann,OU=NJ,OU=US,OU=Users,OU=Demo Accounts,DC=corp,DC=contoso,DC=com' -Reset -NewPassword (ConvertTo-SecureString -AsPlainText "demo@pass123" -Force)

$adUser2 = Get-ADUser -Filter {samAccountName -eq "TFBell"}
$adUser2groups = $adUser2 | Get-ADPrincipalGroupMembership
$adUser2groups | foreach { if ($_.name -ne 'Domain Users') {Remove-ADPrincipalGroupMembership -MemberOf $_.name -Identity $adUser2.DistinguishedName} }
Add-ADPrincipalGroupMembership -MemberOf 'Engineering' -Identity $adUser2.DistinguishedName
Move-ADObject -Identity $adUser2.DistinguishedName -TargetPath 'OU=VT,OU=US,OU=Users,OU=Demo Accounts,DC=corp,DC=contoso,DC=com'

Set-ADAccountPassword -Identity 'CN=Bell\, Teresa,OU=VT,OU=US,OU=Users,OU=Demo Accounts,DC=corp,DC=contoso,DC=com' -Reset -NewPassword (ConvertTo-SecureString -AsPlainText "demo@pass123" -Force)
Get-ADGroup -Identity 'Domain Admins' | Add-ADGroupMember -Members 'CN=Ayers\, Ann,OU=NJ,OU=US,OU=Users,OU=Demo Accounts,DC=corp,DC=contoso,DC=com'
Get-ADGroup -Identity 'Enterprise Admins' | Add-ADGroupMember -Members 'CN=Ayers\, Ann,OU=NJ,OU=US,OU=Users,OU=Demo Accounts,DC=corp,DC=contoso,DC=com'
Within the Windows PowerShell window, add the following script to the script pane, run it to create additional organizational units named Servers and Clients, and move the APP1 computer account to the first of them:
New-ADOrganizationalUnit -Name 'Servers' -Path 'OU=Demo Accounts,DC=corp,DC=contoso,DC=com'
New-ADOrganizationalUnit -Name 'Clients' -Path 'OU=Demo Accounts,DC=corp,DC=contoso,DC=com'
Move-ADObject -Identity 'CN=APP1,CN=Computers,DC=corp,DC=contoso,DC=com' -TargetPath 'OU=Servers,OU=Demo Accounts,DC=corp,DC=contoso,DC=com'
Sign out from DC1.
You should follow all steps provided before performing the Hands-on lab.