

Serverless architecture
Before the hands-on lab setup guide
November 2021
Information in this document, including URL and other Internet Web site references, is subject to change without notice. Unless otherwise noted, the example companies, organizations, products, domain names, e-mail addresses, logos, people, places, and events depicted herein are fictitious, and no association with any real company, organization, product, domain name, e-mail address, logo, person, place or event is intended or should be inferred. Complying with all applicable copyright laws is the responsibility of the user. Without limiting the rights under copyright, no part of this document may be reproduced, stored in or introduced into a retrieval system, or transmitted in any form or by any means (electronic, mechanical, photocopying, recording, or otherwise), or for any purpose, without the express written permission of Microsoft Corporation.
Microsoft may have patents, patent applications, trademarks, copyrights, or other intellectual property rights covering subject matter in this document. Except as expressly provided in any written license agreement from Microsoft, the furnishing of this document does not give you any license to these patents, trademarks, copyrights, or other intellectual property.
The names of manufacturers, products, or URLs are provided for informational purposes only and Microsoft makes no representations and warranties, either expressed, implied, or statutory, regarding these manufacturers or the use of the products with any Microsoft technologies. The inclusion of a manufacturer or product does not imply endorsement of Microsoft of the manufacturer or product. Links may be provided to third party sites. Such sites are not under the control of Microsoft and Microsoft is not responsible for the contents of any linked site or any link contained in a linked site, or any changes or updates to such sites. Microsoft is not responsible for webcasting or any other form of transmission received from any linked site. Microsoft is providing these links to you only as a convenience, and the inclusion of any link does not imply endorsement of Microsoft of the site or the products contained therein.
© 2021 Microsoft Corporation. All rights reserved.
Contents
Duration: 20 minutes
In this exercise, you set up your environment for use in the rest of the hands-on lab. You should follow all steps provided before attending the hands-on lab.
Important: Many Azure resources require globally unique names. Throughout these steps, the word “SUFFIX” appears as part of resource names. You should replace this with your Microsoft alias, initials, or another value to ensure uniquely named resources.
In the Azure portal, select Resource groups from the Azure services list.

On the Resource groups blade, select +Create.

On the Create a resource group Basics tab, enter the following:
hands-on-lab-SUFFIX as the name of the new resource group.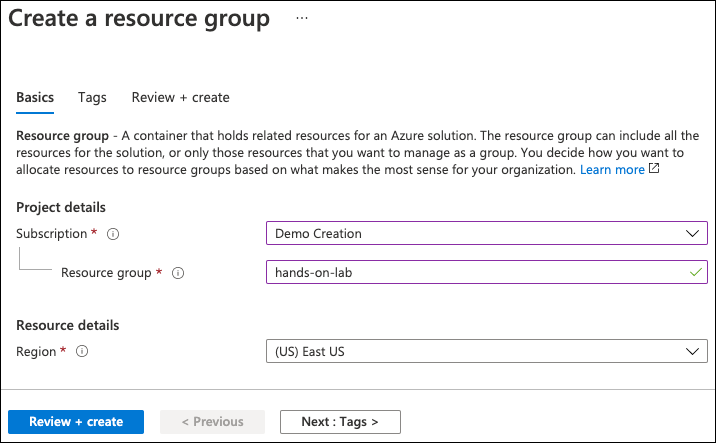
Select Review + Create.
On the Review + create tab, ensure the Validation passed message is displayed and then select Create.
In this task, you run an Azure Resource Manager (ARM) template to create the hands-on lab’s resources. In addition to creating resources, the ARM template also executes a PowerShell script on the LabVM to install software and configure the server. The resources created by the ARM template include:
images and exportLicensePlatesProcessed and NeedsManualReviewdefault subnetTollBoothFunctionsTollBoothEventscomputerVisionApiKeycosmosDBAuthorizationKeydataLakeConnectionStringeventGridTopicKeyNote: You can review the steps to manually provision and configure the lab resources in the Manual resource setup guide.
You are now ready to begin the ARM template deployment. To open a custom deployment screen in the Azure portal, select the Deploy to Azure button below:
On the custom deployment screen, the first parameter you need to populate is the ObjectId associated with the account you used to log into the Azure portal. To retrieve this, select the Cloud Shell icon on the Azure portal toolbar to open an Azure Command Line Interface (CLI) terminal window at the bottom of your open browser window.

In the PowerShell terminal window that opens in the Azure portal, enter the following command at the prompt:
az ad signed-in-user show --query id -o tsv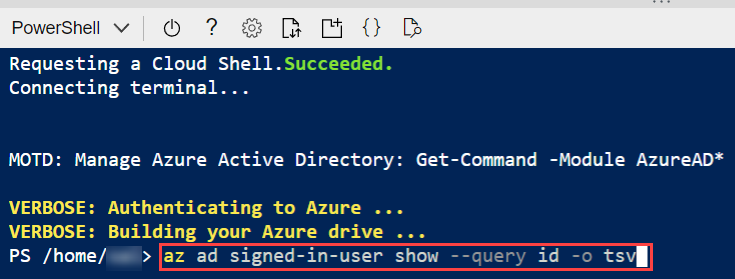
Execute the command and copy the output value.

Now, on the custom deployment screen in the Azure portal, enter the following:
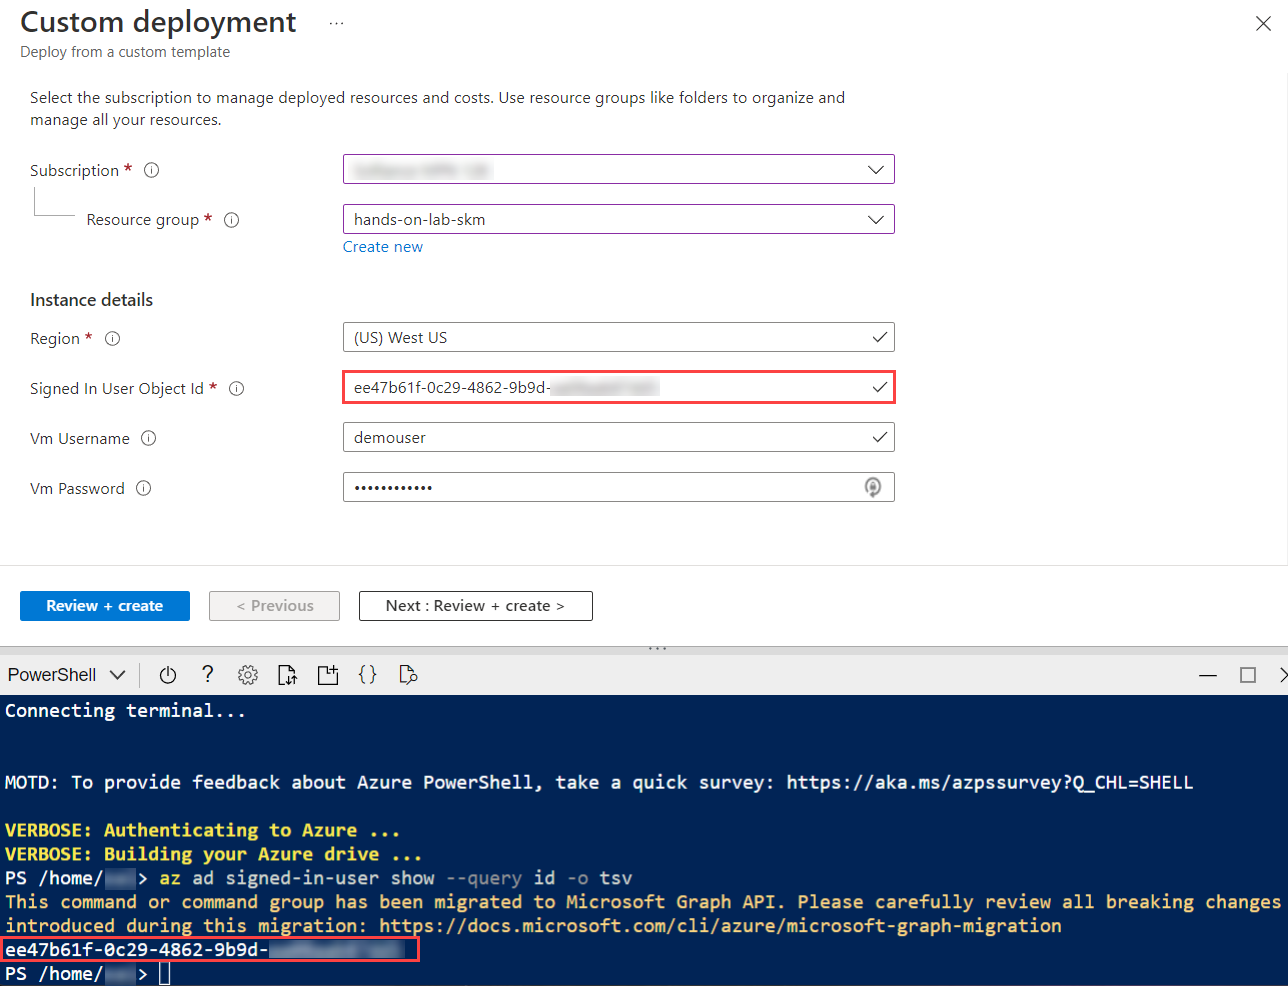
Select Review + create to review the custom deployment.
Note: The ARM template will append a hyphen followed by a 13-digit string at the end of resource names. This suffix ensures globally unique names for resources. We will ignore that string when referring to resources throughout the lab.
On the Review + create blade, ensure the Validation passed message is displayed and then select Create to begin the custom deployment.
Note: The deployment of the custom ARM template should finish in about 5 minutes.
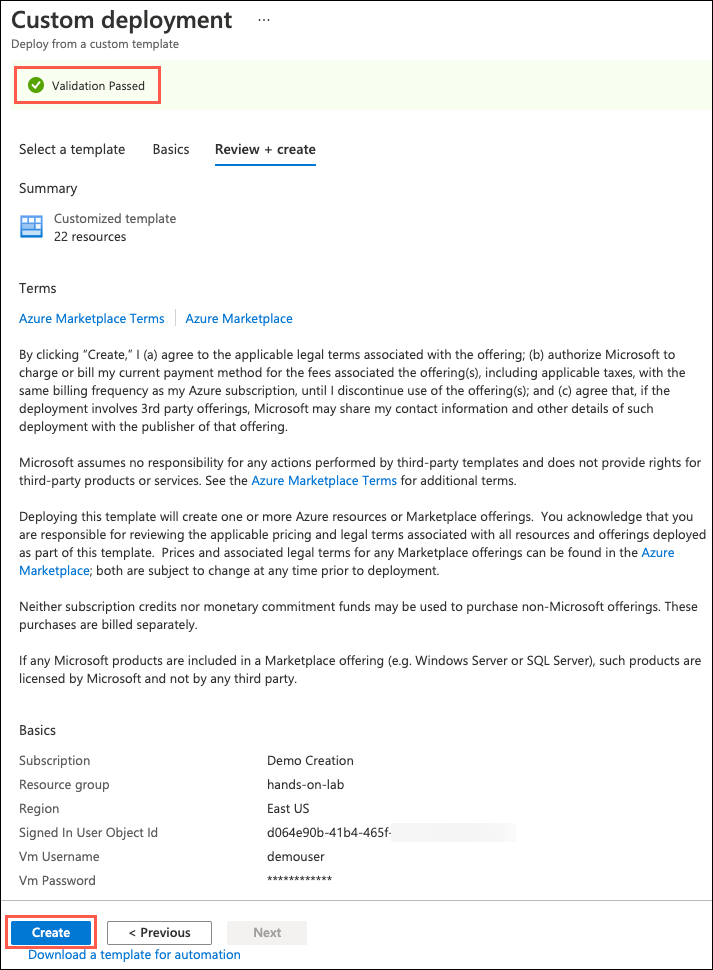
You can monitor the deployment’s progress on the Deployment blade that opens when you start the ARM template deployment.
In the Azure portal, navigate to the hands-on-lab-SUFFIX resource group you created above.
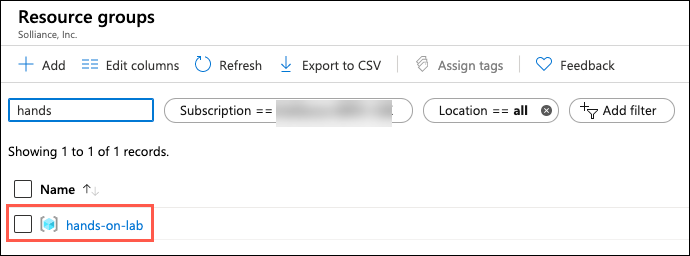
You can get to the resource group by selecting Resource groups under Azure services on the Azure portal home page and then select the resource group from the list. If there are many resource groups in your Azure account, you can filter the list for hands-on-lab to reduce the resource groups listed.
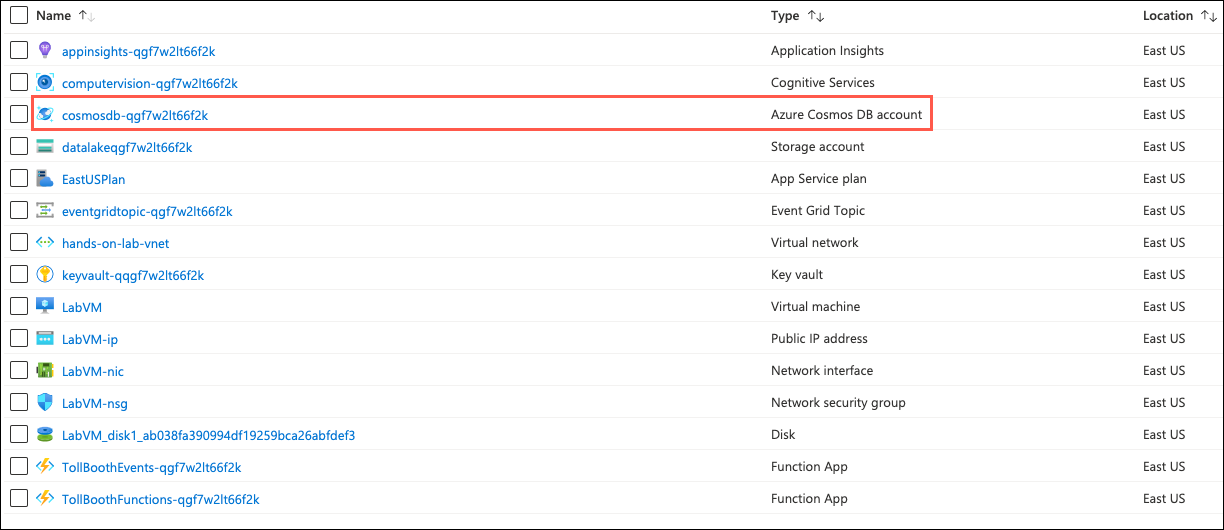
On your resource group blade, select the cosmosdb Azure Cosmos DB account resource in the resource group’s list of services available.
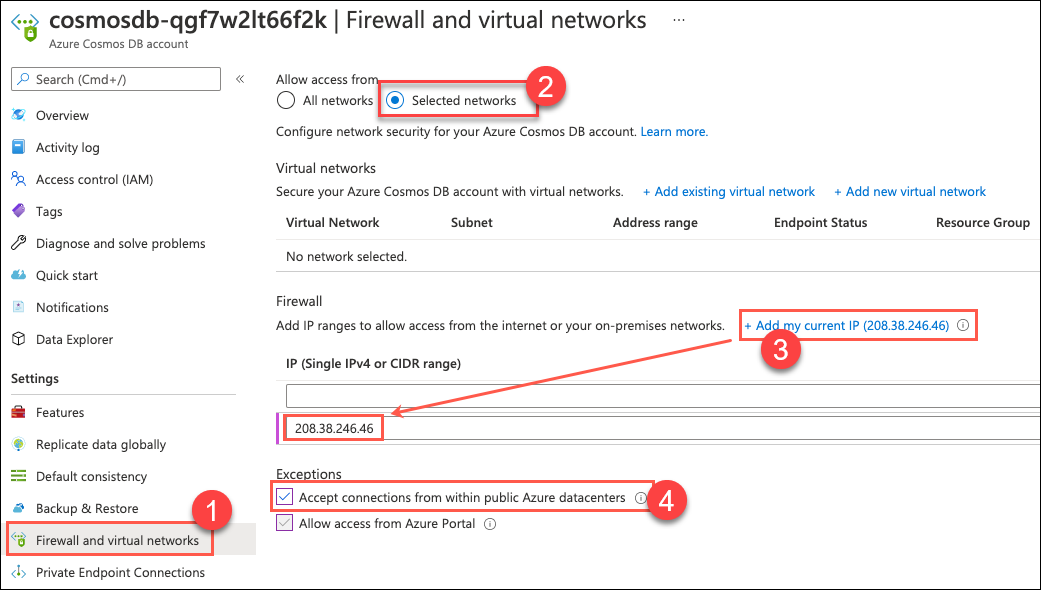
Next, select Firewall and virtual networks in the left-hand navigation menu of the Cosmos DB blade.
Choose Selected networks (2). Select + Add my current IP (3) to add your IP address to the IP list under Firewall. Next, check the box next to Accept connections from within public Azure datacenters (4). Checking this box enables Azure services, such as your Function Apps, to access your Azure Cosmos DB account.
Select Save.
In this task, you create an RDP connection to your Lab virtual machine (VM) and change the default web browser to Microsoft Edge. This will ensure Microsoft Edge is used when launching a web browser from Visual Studio and prevent the functionality issues encountered if using Internet Explorer.
In the Azure portal, select Resource groups from the Azure services list.

Select the hands-on-lab-SUFFIX resource group from the list.
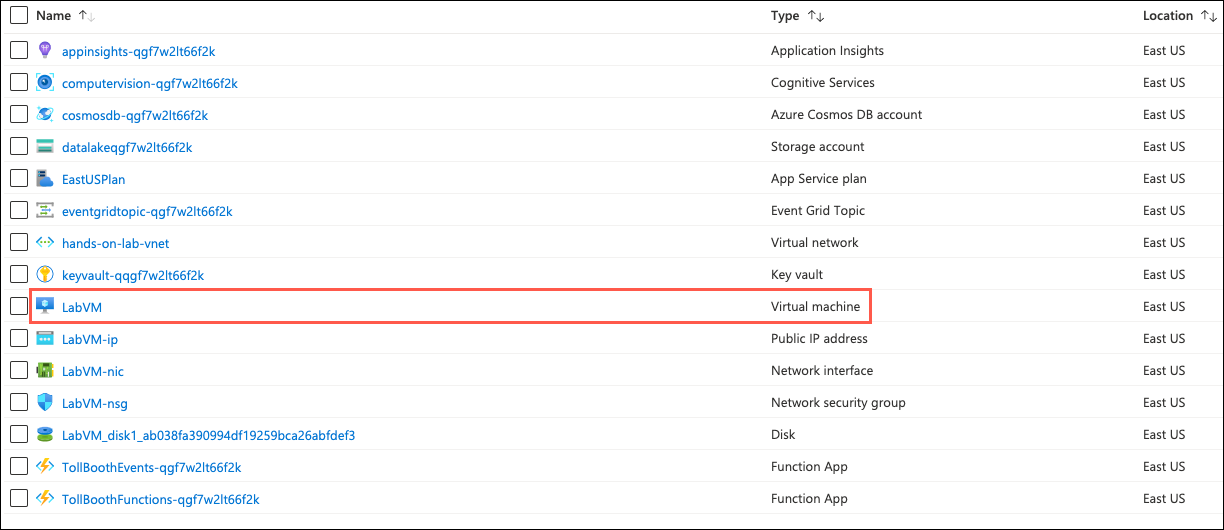
In the list of resources within your resource group, select the LabVM Virtual machine resource.
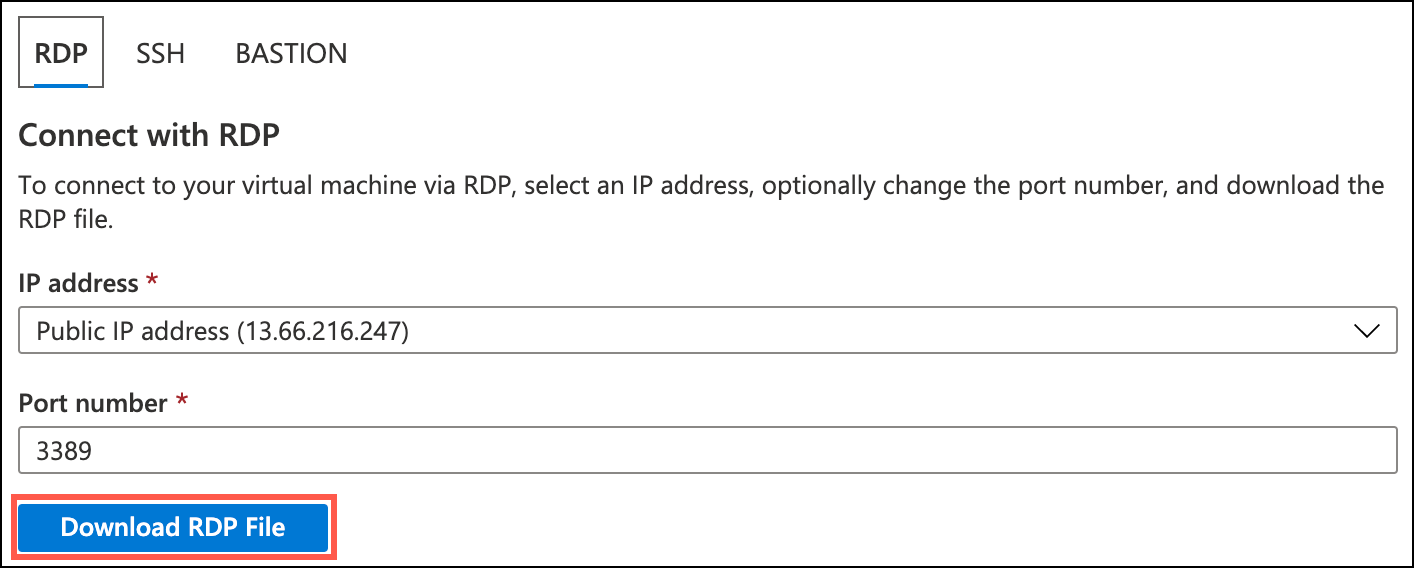
On your LabVM blade, select Connect and RDP from the top menu.

On the Connect to virtual machine blade, select Download RDP File. Open the downloaded RDP file.
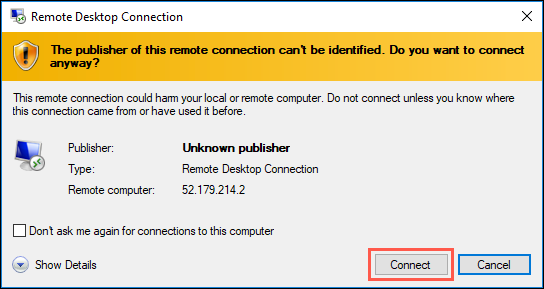
Select Connect on the Remote Desktop Connection dialog.
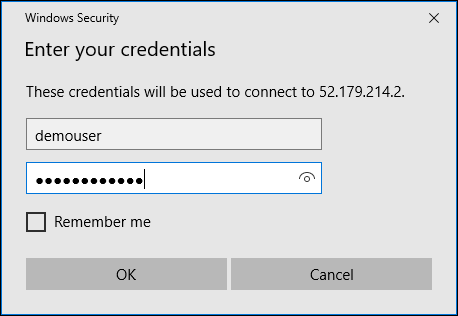
Enter the following credentials when prompted, and then select OK:
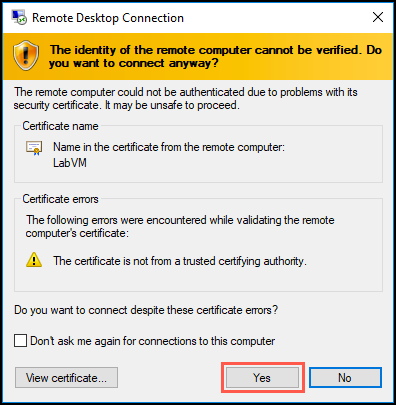
Select Yes to connect if prompted that the remote computer’s identity cannot be verified.
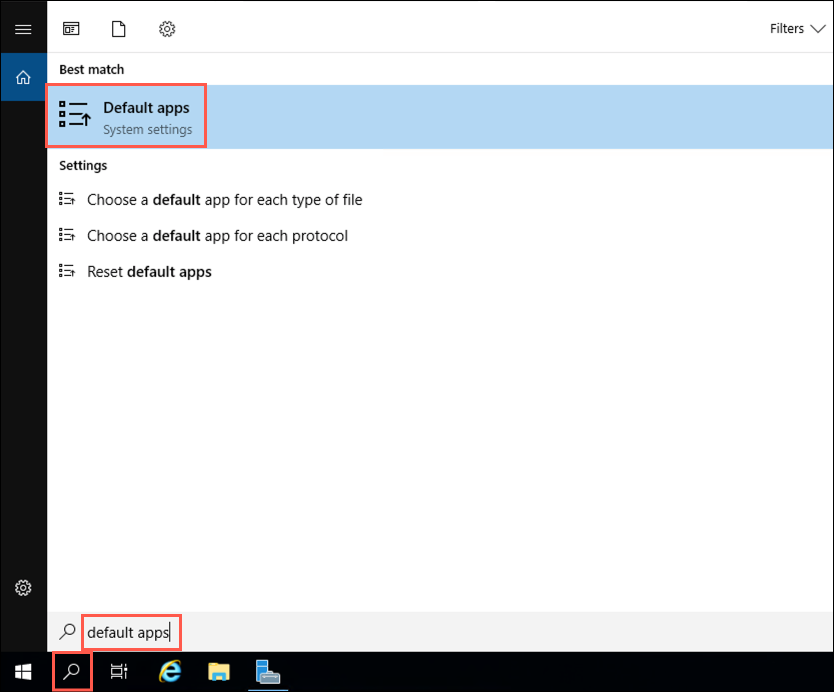
Once logged in, select the Search icon on the start bar, enter default apps into the search box, and select Default apps in the search results.
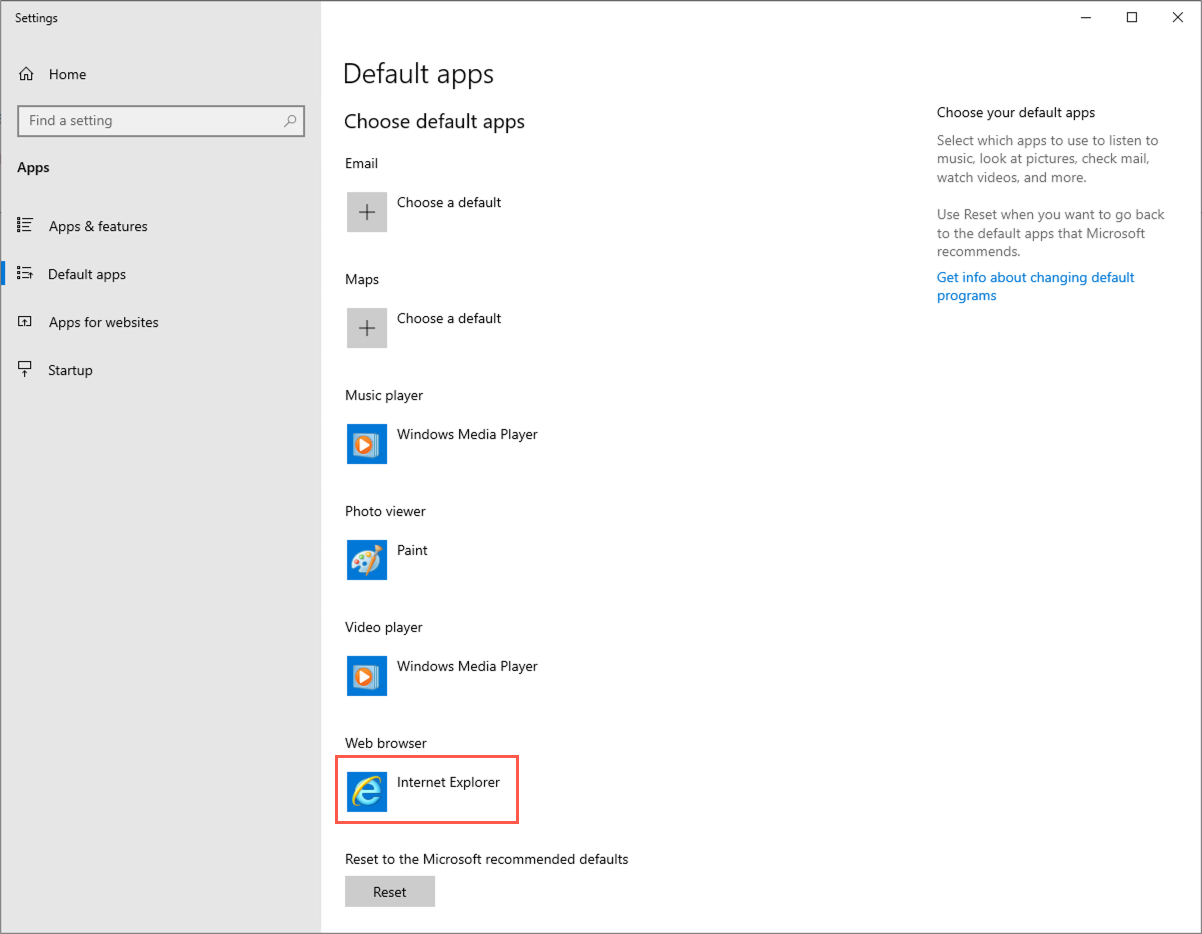
In the Default apps dialog, select Internet Explorer under Web browser.
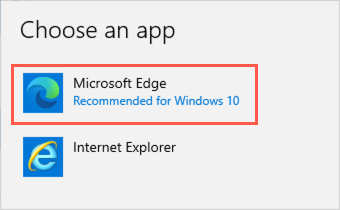
In the Choose an app dialog, select Microsoft Edge.
Close the Default apps dialog.
You should follow all steps provided before performing the Hands-on lab.